

How To Add SSL Certificate to WordPress in 6 Easy Steps
Security, transparency, legitimacy and assurance- these are the major hallmarks of Google. Any and every element related to Google has all these qualities. That is one of the major reasons why Google is where it is today.
More than anything else, it is Google’s unequivocal pledge to ensure the best experience to users that is the highlight of this search engine pioneer.
Talking of customer experience, nothing is more valuable to and desired by the customers than their data’s privacy and security on the internet and rightfully so. To cater to this requirement of its customers, Google has put into place several provisions.
One of those, that I am going to focus on in this article, is alerting users if they visit a non-HTTPS website. The users are notified that the website is not secure and that there is a risk to the privacy of data that they might submit through the website.
While this is good news for the internet users, it might turn out to be a nightmare for someone who runs a website, especially that for a business as customers will immediately conclude your website to be insecure and bounce.
That amounts to lost business opportunities and leads- THE WORST NIGHTMARE for business owners.
As such it is indispensable for you to learn how to add SSL certificate to WordPress sites and ensure that you offer a safe and secure platform to conduct business on. This article is going to help you do exactly that.

What is SSL Certificate OR HTTPS & Why Do You Need It?
Secure Socket Layer AKA SSL is a certificate which when installed and integrated into the website, turns on the HTTPS protocol for the website.
Sounds technically worded? Let me explain in simple terms.
A valid SSL upon installation, followed by all the necessary adjustments, makes your website secure for the users. It does so by encrypting all information provided by the users via different forms placed on the website, thus upholding and ensuring their privacy.
But why is it such a big deal?
There are solid reasons behind that. The foremost reason is that if the customers enter any critical data in the forms such as their credit card details and many more on a HTTPS enabled website, since the data is encrypted, there is no possibility of someone stealing it.
As such it acts as a layer of protection, making the customers feel safe and secure as far as the website’s integrity is concerned.
If that alone isn’t sufficient, there is another, more important reason if you are someone who owns and runs a business website why you should consider installing SSL. It is simply that consumers are now more aware than ever.
When they see the ‘Not secure’ tag mentioned alongside your website’s url, they immediately realize that their surfing experience is at a possible risk. The next thing you know- they will refrain from revisiting and engaging with such websites.
From a consumer’s point of view, it is easy to leave and find another website that serves their need, given the number of options they have readily available. However, for a business owner, this is a major loss- of potential clients/customers and of business dealings and the multitude that comes alongside.
On the contrary, the ‘Secure’ tag along with the green padlock is a mark of security and a way to avoid losing opportunities on account of lack of security.
Thus, saying that installing SSL is advisable would be an understatement. It is a necessity.

Installing SSL in WordPress- 6 Steps to Make It a Secure Place
In the following parts of this article, I am going to guide you through 6 simple steps on how you can add SSL/HTTPS to your WordPress site and make it safe and secure for customers.
Before we get into the procedure, I strongly recommend that you create a backup of your website so that you have something to fall back on in case something goes wrong and in the most undesirable event, you end up losing your website data.
Once you have done that, go through the following steps:
1) Starts With Getting an SSL Certificate
The first step, of course, is to get yourself an SSL certificate. Where do you get it from?
Now the most feasible way to get it is by contacting your website hosting management team. They will provide you with the option to install the SSL certificate. Note that in most cases you will be required to pay a recurring sum on annual basis for the certification.
Alternatively, you can look up for other available options and might even get one for free such as Let’s Encrypt. However, not all hosting providers will accept it. So, make sure that you find the one that works for your website host.
2) Editing The WordPress Configuration
The next step is making change to the WordPress configuration.
To do this, open the wp-config.php file. Next, right before the last line i.e. “That is All, Stop Editing!”, add the following line:
define(‘FORCE_SSL_ADMIN’, true);
You will now have to visit the website’s admin panel through HTTPS i.e., https://
If the site resolves and you find the green padlock, login to it and ensure that the security padlocks is functional.
If so, your admin panel is now SSL/HTTPS enabled and the next step is to make changes to ensure that it is reflected at all places.

3) Ensuring Visibility of SSL At All Instances
This begins by making the required change in the admin panel. To do so, go to ‘Settings’ and under Settings, go to ‘General’.
Here, replace HTTP with HTTPS in ‘WordPress Address (URL)’ as well as ‘Site Address (URL)’.
That’s it for here. Now you are required to make similar changes to every ‘HTTP’ used throughout your website.
This is a crucial step and chances of things going wrong here should not be negated. It is for this very instance that I advised you to create a backup of your website data which will come to rescue in case things go wrong.
Moving on to the next step, you will have to find and replace all ‘HTTP’ existing in your website with ‘HTTPS’.
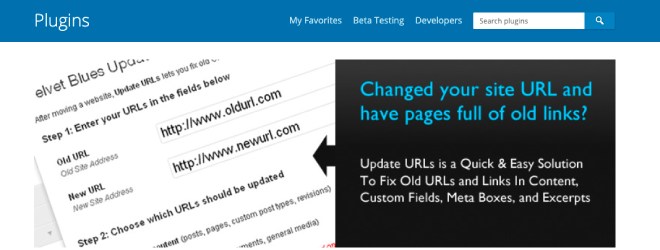
To make the process a bit easier, you can make use of plugins from WordPress such as Velvet Blues & Search and Replace to do the job of amending the protocol.
4) Redirecting Old Pages & Links To HTTPS
The above step will let you make changes to the elements of your website and its different webpages. However, there is still one area of work that you need to cater to.
That is getting all sites that use your links to update the URL. Now going about asking their owners to make changes on their end is not possible. However, you can do something so that whenever people visit your website by following such links, they land on the HTTPS version of those pages/links.
To do so, you need to incorporate the 301 redirect. Here’s how you do it:
- Access your FTP and turn it on to display hidden files.
- Open the file named ‘.htaccess’. If you cannot find any such file, you will have to create one. To do that, create a notepad (plain text) file with the same name and upload it to the root directory in the WordPress.
- Make the following addition to the file:
RewriteEngine On
RewriteCond %{HTTPS} off
RewriteRule ^(.*)$ https://%{HTTP_HOST}%{REQUEST_URI} [L,R=301]
Click on ‘SAVE’.
This will complete the process of making the required changes to redirect your old links and pages to their HTTPS versions.
5) Making The Final Changes & Checks
Now comes the time to make the final changes and most importantly, ensuring that these changes are properly reflected.
Here are the steps:
- Create a new HTTPS version of your site in Webmaster Tools and also upload a new sitemap that reflects the change.
- In Google Analytics property settings, visit the Admin section and update the default URL to the HTTPS version.
- You can run any SEO Plugin and check that it reflects the SSL changes made to your website.
6) Using An SSL Plugin
I would also like to mention that you can alternatively make use of the WordPress SEO Plugin, also known as Really Simple SSL.
While, based on my experience of having served as the SEO Consultant for numerous businesses, I believe that manually adding SSL and converting website from HTTP to HTTPS is a better course of action, you can still make use of the plugin.
There’s one thing to note however. Not all plugins function well with all website and server configurations. If the Really Simple SSL plugin doesn’t work for you, you will have to do things manually.

Security is The Need of The Hour
When the online world is such that users value security more than ever, it would be unwise for website owners to overlook their duty to ensure the same from their end.
Don’t be one of those who undermine their success by not adhering to the benchmarks. This article tells you what exactly needs to be done.
I have tried to create this article to explain the process to you in as simple manner as is necessary to ensure that you are successfully able to amp up the security features of your website and not be left behind in the race.
If you have queries or curiosity, I will be more than happy to address them all.